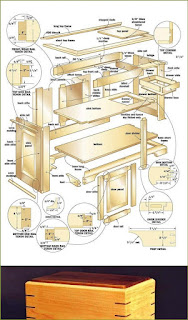
Unlock Your Inner Craftsperson: Simple Woodworking Projects with Detailed Plans
The satisfying scent of freshly cut wood, the precise feel of tools in your hands, and the pride of creating something beautiful and functional â€" these are the rewards that await you in the world of woodworking. Don't be intimidated by the thought of complex projects; begin your woodworking journey with these simple yet rewarding projects, complete with detailed plans. These projects are perfect for beginners, requiring only basic tools and readily available materials. Prepare to unleash your creativity and build something amazing!
Project 1: A Rustic Coasters Set
Start your woodworking adventure with a project that’s both functional and visually appealing: a set of rustic coasters. This project allows you to experiment with different wood types and finishes, creating a unique set that complements your home décor. The simplicity of the design ensures a quick and satisfying build, perfect for beginners gaining confidence with basic woodworking techniques.
Materials You'll Need:
Gather these materials before you start:
- Four pieces of 4" x 4" hardwood (maple, cherry, or walnut work well)
- Sandpaper (various grits, from 120 to 220)
- Wood glue
- Wood finish (e.g., polyurethane, linseed oil)
- Cloth rags
Step-by-Step Instructions:
- Cut the wood: Cut each piece of wood into four 4" x 4" squares. Use a miter saw for clean cuts, but a hand saw will work as well.
- Sand the edges: Smooth the edges of each square with sandpaper, starting with a coarser grit (120) and gradually moving to a finer grit (220) for a polished finish. This removes any splinters and creates a smooth surface.
- Apply the finish: Apply a thin, even coat of your chosen wood finish to each coaster. Allow to dry completely, then apply a second coat for better protection and richer color. Let it dry completely before using.
Project 2: A Simple Wooden Box
Once you’ve mastered the coaster project, you can level up your skills with a small wooden box. This project introduces you to more advanced techniques, such as joining wood pieces and creating a lid. This practical box can store small treasures, jewelry, or even serve as a unique gift.
Materials You'll Need:
For this project, acquire these materials:
- Six pieces of 1/2" thick wood (pine, cedar, or plywood work well): two for the sides (3" x 6"), two for the ends (3" x 4"), and two for the base and lid (4" x 6")
- Wood glue
- Wood screws (1" long)
- Small hinges
- Sandpaper
- Wood finish
Step-by-Step Instructions:
- Assemble the box: Apply wood glue to the edges of the sides and ends and clamp them together, forming a rectangular frame. Pre-drill holes before screwing the pieces together for a cleaner finish. Let the glue dry completely.
- Attach the base: Glue and screw the base to the bottom of the frame.
- Create the lid: Attach the lid to the box using small hinges.
- Sand and finish: Once everything is dry and assembled, sand the entire box smooth and apply your chosen wood finish.
These two projects offer a fantastic starting point for your woodworking journey. Remember to prioritize safety, always wearing safety glasses and following proper tool usage. Enjoy the process, embrace the learning curve, and savor the satisfaction of creating something tangible with your own two hands! Happy woodworking!


0 comments:
Post a Comment
Note: Only a member of this blog may post a comment.